By: aliased
Creating a realistic water surface in Photoshop is quite a
challenge because it is the distorted reflection of the surroundings that makes the water
look liquid. The displace filter is an excellent tool for making this distortion.
The displace filter "shifts pixels" in an image according to the brightness
values of a displacement map. You can use any .psd file as a displacement map (if
saved with "Maximize compatibility"). Displace uses the first and the second channels
of this .psd file for horizontal and vertical displacement respectively. Each channel
is a grayscale image. Medium gray (brightness 128) does nothing. Darker values will
shift an image in the positive direction (in Adobe coordinates). Brighter values cause a
shift in the negative direction. The amount of displacement can be controlled separately.
At a scale value of 100, the displacement measured in pixels is equal to 128 minus
the brightness of the displacement map. For example, a white pixel will shift an
image 128 - 255 = -127 pixels at the corresponding pixel at that setting.
The following tutorial shows how to create a relatively simple
displacement map and how to create a water surface with it. This method does not
adjust for wave height and distances, but it produces good results if the water is calm
and if the surface is not intersected by other elements.
|
Part one: creating a displacement map
We start with making an image in which the brightness
represents the height of the surface. Bright is high, dark is low. The
dimensions of this image control the size and shape of the waves. Start with a larger
image to create smaller waves.
|
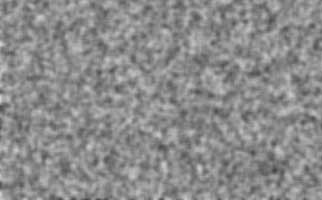
- Create a new file in RGB mode of 1000 pixels wide by 2000 pixels
high.
- Go to Filter > Noise > Add Noise... Enter these
settings:
Amount: 400%
Distribution: Gaussian
Monochromatic
Click OK
- Go to Filter > Blur > Gaussian Blur... Choose a
radius of 2,0 pixels and click OK.
|
 |
|
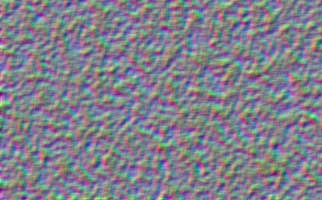
We will use the result of the previous steps as a bump map to create a
representation of the tilt of the surface. We will do this separately in channel 1
and channel 2. You can ignore channel 3. It does not affect the displace filter.
|
- Select channel 1 in the channels palette.
- Go to Filter > Stylize > Emboss... Enter these
settings:
Angle: 180°
Height: 1 pixels
Amount: 500 %
Click OK
- Select channel 2.
- Apply the Emboss Filter again, but this time use an angle of 90°
instead of 180°.
|
 |
|
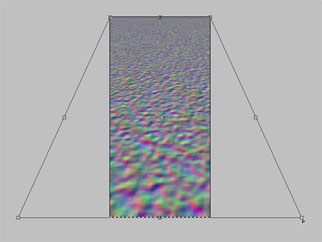
Now we are going to change the perspective. Stretching the base lowers the
horizon. We would have to drag the corners to infinity to extend the water
surface all the way to the horizon. We will not do that. Stretching to anything above
about 3000% is enough. The perspective stretch only works between 0 and 700%, so
we will stretch to 600% twice. This equals 3600%.
|
- Unlock the background layer.
- Zoom out and go to Edit > Transform >
Perspective.
- Drag one of the bottom corners to the side, to a width of 600% and hit
Enter.
- Select the canvas with Ctrl+A / Command+A.
- Press Ctrl+Shift+T / Command+Shift+T to transform again.
- Crop away the area outside the canvas with Ctrl+A / Command+A and Image
> Crop.
- Reduce the height of the image to make it square. In this case 1000 by 1000 pixels.
|
 |
|
In reality, waves cause rotations in a reflection instead of translations. As
a result, the horizontal distortion decreases towards the horizon. The vertical
distortion does not. However, we have to adjust channel 2 as well, because the
perspective change has caused aliasing near the horizon. We will use motion blur
later to compensate for this.
|
|
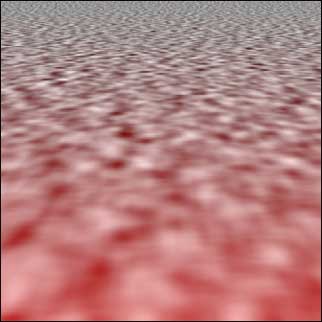
First adjust channel 1:
- Select channel 1.
- Press Q to switch to Quick Mask Mode.
- Draw a white to black linear gradient from the top down across the image
to create a gradient mask.
- Press Q to go back to Standard Mode. Now we have a
gradient selection.
- Fill with medium gray (brightness 128).
|
 |
|
Adjust channel 2 in a similar way:
- Select channel 2.
- Go to Quick Mask Mode.
- Draw a gradient to select the narrow part near the horizon where the
waves are too large.
- Press Q to turn the mask into a selection.
- Fill with medium gray.
|
 |
| |
|
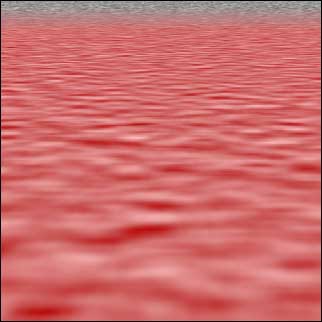
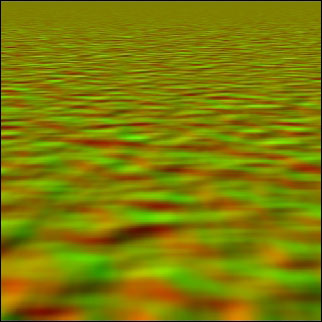
This is what the finished displacement map should look like
with the blue channel hidden. Note that in the green channel, the bright areas
will shift a reflection upwards, which represents a tilt towards you. The dark
areas produce a tilt away from you. This may be a little confusing because it's
probably the opposite of how your brain interprets the brightness variations.
- Save as .psd with "Maximize Compatibility".
You may have to change the preference at Edit > Preferences >
File Handling > Maximize PSD File Compatibility to be able to save
with Maximum Compatibility.
|
 |
|
Part two: creating a water surface
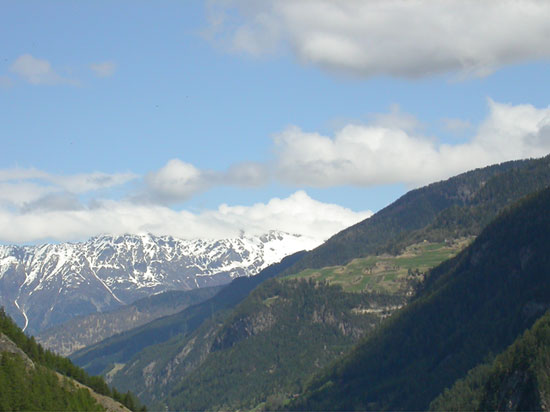
We will create a lake in this valley.
|
|
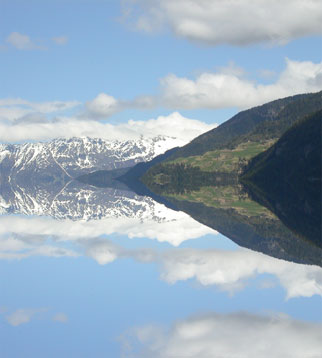
First, we have to make a "flat" reflection which we will
distort later with the displace filter. In this example, we will treat the landscape
as a single background object. This only works if the background is very distant.
- Determine where the horizon should be. Select everything above this line
and copy it to a new layer. This will be the reflection layer.
- Extend the canvas downwards to make room for the
reflection.
- Flip vertical and move the layer down to mirror it with the
background.
|
 |
|
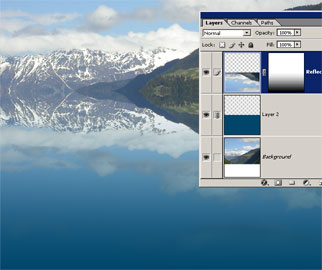
Near the horizon, almost 100% of the light is reflected of a water surface. At
higher angles, the reflection component becomes smaller so you can see the
color of the water itself. The color will be dark blue or turquoise if the
water is clear. Of course, you can make any liquid you want by using another
color.
|
- Create a new layer below the reflection layer and link it to the reflection layer.
- Fill the area behind the reflection with the desired color. (You can adjust it later with
Hue/Saturation.)
- Add a layer mask to the reflection layer. Draw a white to black gradient
down from the horizon to show the lower part of the color layer.
|
 |
|
Now we can add some wind. Before applying the displacement map,
we will use motion blur to simulate the effect of the waves in the
distance. The blur distance depends on the size of the image and the
wind effect you want to create.
|
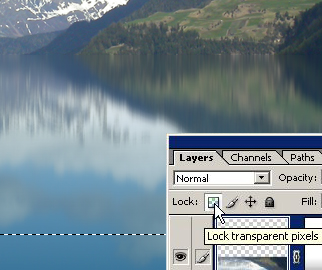
- Select the reflection layer and Ctrl+click / Command+click the layer
mask to make a gradient selection.
- Lock the transparent pixels by clicking the little checkerboard icon in
the layers palette.
- Go to Filter > Blur > Motion Blur... Use an angle
of 90°. Set the distance value and click OK.
- Repeat the motion blur with Ctrl+F / Command+F.
- Unlock the transparent pixels and deselect.
|
 |
|
Now we are ready to apply the displacement map. To prevent aliasing in high
contrast edges, we will scale the layer up first. You
can skip the scaling steps or use smaller values if you are going to scale down
the final image anyway.
The displacement map will stretch or shrink to fit a selection. To get the right
perspective, the horizon of the displacement map should approximately coincide
with the horizon of the scene. Here, we can just select the content of the
reflection layer to get the right alignment.
Only a little displacement is enough to make the water look liquid. The right amount of
displacement depends on the size of the image and height of the waves.
|
- Use Transform to scale the reflection layer to 400% in
both directions.
- Ctrl-click / Command-click on the reflection layer thumbnail to make the
selection.
- Go to Filter > Distort > Displace... Enter the
amount of displacement. The horizontal
scale value should be about 50% of the vertical scale. Also select "Stretch To Fit" and "Repeat Edge
Pixels". Click OK.
- Find the displacement map on your computer and click "open" to apply
it.
- Deselect and use Transform to scale back to 25%.
|
 |
|
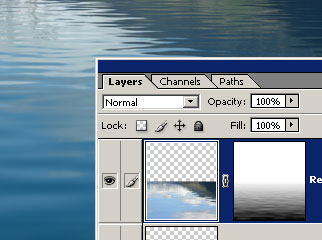
Now it really looks like water. Notice that the layer
mask is also distorted because it is linked to the layer. This causes
the reflectivity to change with the angle of the surface.
We will make some final adjustments to complete the image.
|
- Select the layer mask, go to Levels and change the white
output level to about 240 to make the surface slightly transparent near the horizon.
If needed, use the other sliders to further adjust the reflectivity.
- Finally, cut away the edges of the image if the repeated edge pixels are
noticeable.
|

|

|
� all photoshop tutorials
|